Showing posts with label sewing. Show all posts

Monday, February 7, 2011

{LOVE my new sewing machine}

But not everything I've been doing has been made on that. I did something I haven't done in a long time that I'll show you on my next post. I broke my $5 iron and have to go get a new one so I can iron a few seams before I show you. But I'm pretty proud of my work. Stay tuned.


But before the disastrous smell started coming from my lovely iron.. I made two of these! I LOVE them. My sisters are having babies. One has decided not to find out the gender and the other is having a boy. I thought either way, it would be nice to have something with ruffles, but in a gender neutral color so everyone doesn't assume girl. I would want something with ruffles. Wouldn't you?

Nursing covers. I bought 3/4 yard of each and ended up cutting about 6 inches off of the long end to make it more square and using the leftovers for the neck strap, ruffles, monogram. I think the monogramming makes it so that either side can by showing. There's no wrong way to eat a reese's... I mean wear this nursing cover. I used a little of my own leftover flannel. Hopefully a little more comfortable on the neck too. 
Due to my lovely sister having a boy - we're having a shower! I saw this darling banner over at dandee


And this lovely wreath I made because I only have fall wreaths. I needed something bright and springy. These tissue paper flowers are everywhere, but I thought this was so fun. and pretty much real cheap and real easy. Hope you enjoyed my crafting this month!!! Let me know if you'd like any tutorials.


Friday, January 7, 2011

I'm ALIVE

and crafting just as much as ever. No time to blog. Nate hand made these awesome teeth for us for a Vampire Halloween party. Nate has a lot better mean face than I do. They fit our teeth perfectly.
I am in LOVE with these booties. They are PERFECT!!! Do they make them my size? Seriously. Cost me 74 cents for 4 pairs. Mostly because I used stuff I already had around the house. I used this tutorial. They keep my kid's feet warm, they NEVER fall off and they're pretty darn adorable to boot. No pun intended.
I don't think I've ever posted about these stockings. I made these. I LOVE them. Kind of whimsical. I got the ideas mostly from Hable stockings at Garnet Hill. If you read this do you think I should write Jeff or Jefferson on the last stocking. It's the ongoing debate in my head.
And I loved these silhouette pillows I made for my Mom so much that I made a 2nd set for myself. I love these two.
And finally. Yardsale: $5 + $1 can spray paint. Now she has a high chair to match her kitchen in my favorite color:.... red. :)

Thursday, November 4, 2010

{casper}

She was pretty friendly just like casper but also like to scare people... as you can see from the pictures.
Made this... all for $1. Yep! Love it. Turned out way better than I thought. I hoped to post it on a linky list over at my fabulous SIL's blog.
To make this costume basically cut a bunch of 3in. by 36 in. strips of tulle.  The less perfectly straight the better. Gives it kind of a creepy feeling.
 Tie it onto a ribbon or another piece of tulle like you would if you were making a tutu. Than randomly tie other strips of tulle onto the rest of the body ... drape some over the head... kinda hard to explain but try to recreate.... this.

 Love this phrase from "How to Train your Dragon"! :) If you've seen it, you know what I'm talking about. :) Hope you all had a fabulous Halloween! Loves

Friday, May 28, 2010

{fabric rosette bib necklace}

So gave this a try and I love it. Wish I had made two. I gave this one to my darling mother-in-law. Takes less than 1/2 hour to make and you end up with this beauty.
I used this tutorial for the rosettes and then just hot glued them unto some felt. and glued the ribbon in between them. All made with leftover fabric.

Thursday, April 15, 2010

{my sleeping beauty}

I made this dress for my sleeping beauty for her birthday.
Photobucket
Photobucket
She loves it!

Saturday, April 3, 2010

{officially has a name}

This is kind of two posts in one...
I altered this little suit because it was built for an 18 month old.. seriously. Who blesses their baby when they're that old. It took a lot of altering.

I set up our bedroom for a photo shoot and voila.
I love them.
Photobucket
Photobucket
Photobucket

Wednesday, February 17, 2010

bedding

I had a great time creating something for my little kiddos that coordinated but were different. They're sharing a room and I wanted Aria to have something special and new too. I bought a $25 dollar full size comforter set (2 shams, comforter and bed skirt). I had some white fabric lying around from previous projects. a $4 plain white bumper pad, and about $6 worth of fabric for the backing and 80 cents on the embroidery ties. It took a lot of planning and rearranging to turn it into something I love but I am PLEASED with the results.
Jefferson's quilt, pinning the binding:

Aria's quilting: (p.s. love these quilt frames. Small but AWESOME! Thanks Cami.)

bumper pad and bed skirt:

bumper pad:

I LOVE it.

Thursday, December 3, 2009

{baby boy's homemade love}


I loved making this something special for my little something special. I'm excited to wrap him up in it and cuddle with him. I want him here already... I'm thinking it's probably a little early to be thinking that. Third trimester... I'm here! I love the little fishing print and I LOVE the alphabet print. The brown is a suede so it's also really soft... I think I want to cuddle in it myself.

Wednesday, October 28, 2009

{butterfly costume}


Used this Martha Stewart Tutorial... kind of.
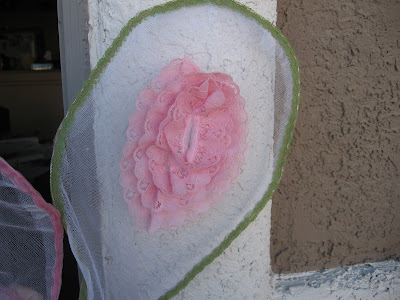
I used sewed together pieces of tulle. Trimmed it with ribbon and then used lace that I had around the house to make the spots on the wings.

For the headband, I bought a dollar store headband that originally had little pumpkin heads on the ends. I took those off. Hooked Tulle poof balls... using this tutorial on the ends. Wrapped the wire in embroidery thread and wrapped the headband in ribbon. Love it. So does Aria. See this post for pictures of her.

Wednesday, April 8, 2009

{felt fruit}

I wanted to make Aria some play food... I'm still working on some more... but this is what I could get done in time for her birthday. I made four fruits.. The first one was a watermelon The hardest thing was doing it without a pattern... They're not perfect, but I like them.
I used whole sheets of felt to give it a little more stability... you can just cut strips and zig zag those together or use one of the other stitches I've talked about before. I just used a zig zag stitch on my sewing machine.
I sewed little black buttons on for the seeds.
Most websites that had any tutorials on this said to stuff it with filling from craft store. I just stuffed it with my felt scraps. You stuff it much the same way you would finish a pillow or a quilt binding.
I consulted this tutorial when making my banana, but used my own pattern. I actually got out a real banana to make sure it would work. This is Aria's favorite. It's the most interactive. She peels it and tries to eat it, almost every time she sees it.
I also made a grapefruit and a carrot... sorry I forgot to take pictures but you get the idea. It was so funny, aria is so used to baby carrots that when she saw the green on the end of the carrot she had no idea what it was.

Tuesday, March 3, 2009

{HEADBOARD}

I LOVE this new 'head board'! I've only had it up for one day, but I think it looks great. I bought a tan sheet from Walmart for 2.77 and started painting that beloved motif on it months ago. I've got two panels just like them now. It took me FOREVER. I got so tired with it that I finally put it away and just now broke it out again. I backed it with the white fabric that I found in my Grandma's closet. LOVE free fabric... especially white and then I bought some flannel sheets at target that were on CLEARANCE for 3.77. The color ended up matching perfectly. Last Saturday I bought a 93 cent PVC pipe, a couple of nails and voila. You have a magical headboard. and now I LOVE the green side of my bedspread. I think it may have been just a little too much green for me before. I'm thinking about painting the same (but larger) motif on the bedspread, what do you think?
p.s. don't you love my new lamps and bedstands? Thanks Mom!

Wednesday, December 3, 2008

{pillows}


I am so happy with how these turned out - I searched the internet for a design I liked and then free handed my version of it onto a piece of contrasting felt. I then cut out each individual piece and then hot glued them on. This is an appropriate adhesive if they will not be handled frequently, but since these are couch pillows I decided to sew around all the edges. Completely made out of felt. It totally dresses up our couch to have a small pop of color and I LOVE the design. These are pillow cases so they can be changed at any time. But I don't think I'll be doing that for a long time!
If I were to do it again, I would choose a different fabric to work with - so I could use an iron adhesive first. Sewing became a little cumbersome when the fabrics were SO thick.

Tuesday, November 11, 2008

{phantom of the opera - a little late}


Guess what! A First for me I MADE our costumes! I Don't think that I will ever attempt this many pieces in one year again. Luckily these things can probably be used for other costumes down the line - or we can just be phantom of the opera every year... jk

I am wearing 7 pieces and Nate is wearing 4. I made 4 of mine and 2 of Nate's. To Best follow the movie and still maintain modesty I had to wear a 'shade' shirt and a lace chemise. The lace chemise is of my own design - an old curtain folded in half then stiched down the sides then trimmed with extra lace at the arms and neck.That was then topped with a corset that I got on ebay.

Then I was getting down to the last wire when I was making these skirts so I just cut out the basic shape for my skirt - and then it tied in the back. I made two of these one for the under 'white' and the other out of the lace curtain from before. I liked the overlay effect. It had a small train.just hemmed at the bottom and at the top.

The hardest thing on my costume was the robe. made out of an old shower curtain from DI and more of the lace curtain. meant to be this: I looked everywhere for a robe pattern that would be similar so resorted to a costume medieval pattern. However it didn't have any sleeves so I used the sleeves from a different pattern and just attached them to the robe. Made them 3/4 length and attached pre-made billowy lace. p.s. lace can be expensive. This costume means a lot to me because my Grandmother passed away a little over a month ago and she was an avid sewer. My costume is made entirely out of lace given to me from her.

Doesn't he make a great phantom?
I made his suit coat - tails and everything! I think it looks great on him. Not high quality enough to wear to church but sure looks great as a costume. I didn't use the appropriate interfacing or lining, but it's good enough and I think he looks great. On a side note, I have to say that this was one of the hardest patterns I've ever done... True to the nature of the period. pleats where they're not needed extra junk.... yuck. I left a lot of it out.


For Aria's costume I borrowed the monkey jacket from my wonderful sis-in-law and she got it from Old Navy - great costume for kids who live in cold weather. Too hot for Las Vegas, but SO cute. I wanted Aria to be a musical monkey though, so I made her little cymbals to mimick the movie. cymbals: 2 small paper plates spray painted gold. fancy ribbon threaded through for the handles. voila! She doesn't like me to take pictures of her, so here she is running away saying haha you can't catch me. I love her.

Friday, August 1, 2008

{cherry dress}

Oh my gosh, I love it!!! My Mother-in-law recently bought me this cute cherry dress. uno problemo - It was just a little too short for my taste, so I thought I'd just add some fabric to the end. I decided to include a little tulle. I love how it turned out. I also ended up pulling it in at the chest. It was so easy to alter.

Total cost:
red fabric - $1.78 per yard, 1/2 yard = $.95
black tulle - $.77 per yard, I bought 1 1/2 yards = $1.10, I used 1/2 yard = $.38
Dress - $19.95
3 hours = 1 nap time

Thursday, July 31, 2008

{my first tote bag}

It's funny how I kind of go through kicks. Lately I've been sewing like crazy. A friend of mine gave me this home decor fabric that didn't really match anything in my house, but I thought it was fun. Too thick to use for clothing, but I turned it into this homemade tote bag. I used some leftover pieces of fabric I had lying around. The pockets are measured to a perfect size for me! I love the pleats, I'm hoping my next one will be bigger. It seriously looked huge when I was cutting the fabric...but what can I say, no pattern....

Things I learned:
~I bought a plastic place mat from the dollar store to make the bottom of the bag hard. I then cut it to shape. Most purses have this, they just need more support in the bottom.
~To make a flat bottom, you basically cut squares out of the corners and then sew them in the opposite direction (as shown below).

LinkWithin

Related Posts with Thumbnails

{my music}


Get a playlist! Standalone player Get Ringtones